Written by: Alex Johnson
Successfully starting plants from seed is one of the most rewarding experiences there is for a gardener, no matter if you’ve done it a hundred times, or never sown a seed before in your life. There is something primal in the excitement we feel watching a sprout emerge from the ground, something that taps into a deep seeded instinct to nurture and to care, pun intended. Of course, this process can be intimidating for inexperienced growers, and due to the ready availability of starter plants at the nursery, many may shy away from the activity. While starts are a great option for many gardeners, growing your own plants from seed has a whole host of advantages. It is by far the most economical way to start a garden, and allows control over every step of the process; you know exactly what is, and what is not, in your plants. This post will endeavor to explain the entire process in simple, straight-foreword terms, and hopefully will serve as inspiration and encouragement for you to try it out for yourself!
Let’s get started!
Step 1: The Plan
Any experienced gardener will tell you that seed starting is a timing game. Knowing when and how to start your seeds can be the difference between giving your seedling a successful head start, and starting them off on a back-foot. There are many great resources available online, with information tailored specifically to where you live. For those of us living here in the Lower Mainland, one of the best resources available comes from our friends at West Coast Seeds. Their Gardening Guide is a fantastic source of information, with their seed starting calendar being particularly invaluable.
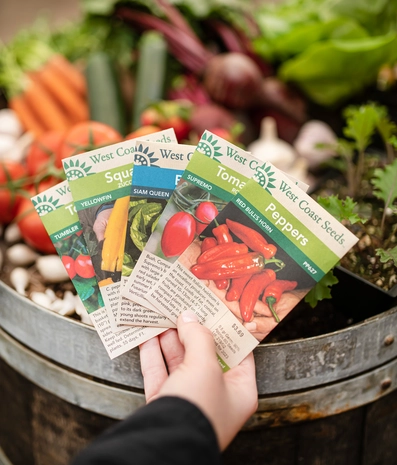
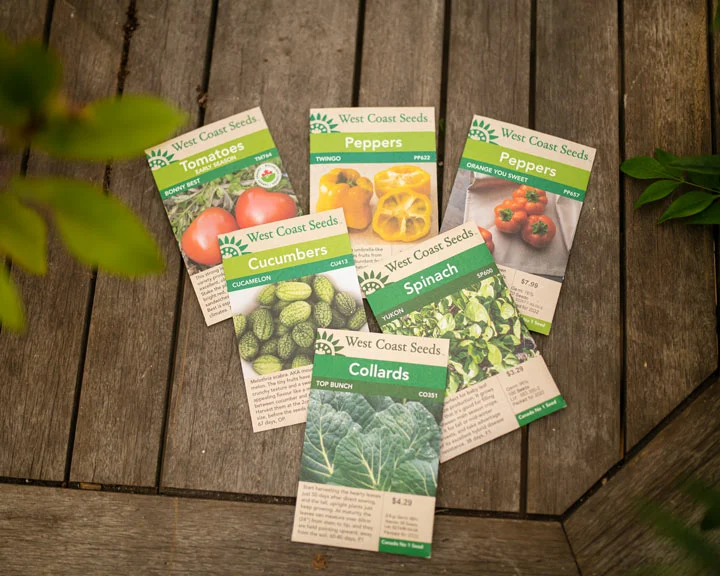
Now, armed with the resources you need, it’s time for the fun part, picking your seeds! With so many seeds to choose from, this can be a little intimidating at first. Instead of getting overwhelmed, start by asking yourself a few basic questions to narrow things down.
Firstly, what do YOU like? Growing plants from seed is an act of love, and it’s best to choose plants that will excite you, inspire you to nurture and care for them. Pick a seed because you think it’s beautiful, pick a seed because it reminds you of your childhood, but for whatever reason you decide, make sure it ignites a passion in you!
Secondly, what CAN you grow? Be realistic here, both in terms of available space in the garden, as well as exposure to sunlight. If you have limited space and a northern exposure, you’ll need set yourself up for success by choosing plants that can tolerate these sort of conditions. Here is where the West Coast Seed Gardening Guide comes in again. It will have detailed information on the requirements of each plant, and can help you choose what to grow where.
Lastly, WHEN should you be growing? As stated above, timing in the garden is very important. Some plants do best in the early and late season, when temperatures are cool, while some plants need the heat of summer to thrive. Starting your season early with plants suited for cool season growing, then transitioning to summer-lovers is a great way to ensure beauty and bounty all year long!
An important tip: know your average first and last frost date. These are dates obtained by averaging climactic data from the past 30 years, and are a useful benchmark when planting seeds. Here on the Lower Mainland, March 28th is our average last frost date, November 2nd is the average first frost date.
Step 2 : Gather Your Materials
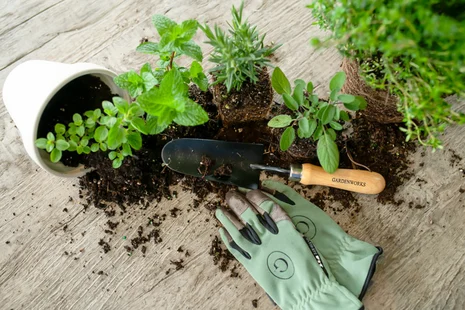
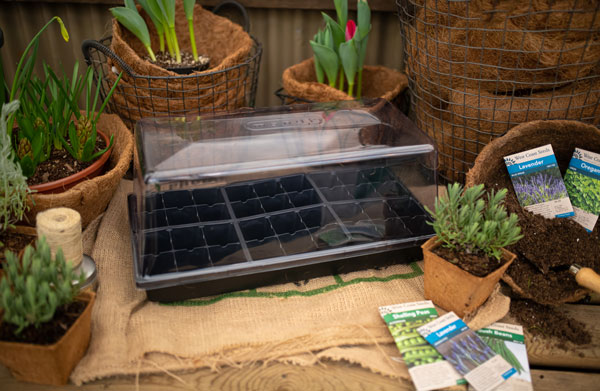
Now that we have picked our seeds, it’s time to gather the rest of the materials. There are only a few things you will absolutely need, all of which can be found at GARDENWORKS.
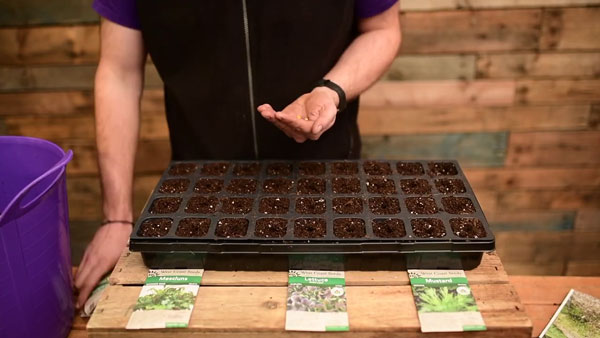
A seed starting vessel
This is the container that will hold the media and young seedlings. The most simple and straightforward system is a seed tray, with a seedling insert placed inside. They come in a couple of standard sizes, with the most common being 10”x 20”. Many insert materials are available as well, ranging from plastic, to biodegradable peat and coco.
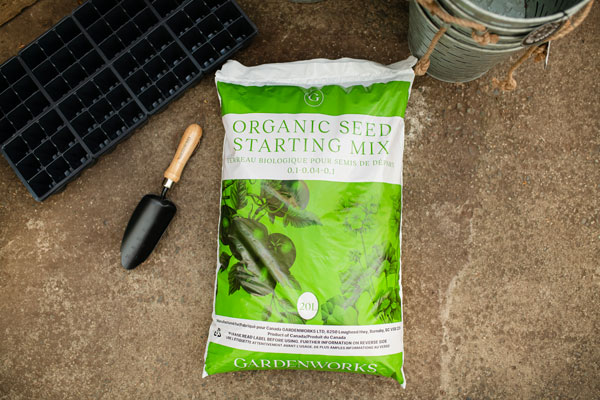
Seedling/germination media (soil)
This is a media designed specifically for stating starting seeds, and will have three main features: a fine texture, high water retention, and good drainage. An example of this would be our exclusive GARDENWORKS Organic Seed Starting Mix.
Humidity dome
This is a clear plastic dome, placed on top of the tray to increase humidity during germination. They are available both with and without vents, the former giving you slightly more control over the humidity inside the dome.
Step 3: Prepare Your Media
Time to get dirty! The most important thing to remember when preparing your seedling media is to moisten it thoroughly before you fill your seed tray. Peat, the main component in many seedling medias, is hydrophobic when dry, and will therefore take some effort to properly saturate.
To saturate your seedling media, follow these steps:
- Dump a portion of seedling media into a large container, such as a bucket or pail.
- Slowly add water and start to work media with your hands, taking care to break up clumps and remove any large debris.
- Continue to add water until the media will hold together in a rough ball shape after squeezing in your hand, but stop before the media is dripping.
- Once your media is properly saturated, you can begin to transfer it into your seed starting tray. Be sure to gently firm the media into the insert, ensuring there are no large air gaps. You are not looking to compress the media, as this will force out all the trapped air, therefore robbing young root systems of vital oxygen.
Step 4: Planting the seeds
With your seed tray filled and ready, it is time to start planting your seeds. Start by first creating small holes in the center of each cell, the eraser end of a pencil works quite well for this. As a general rule of thumb, a seed should be planted at a depth equal to 3x its diameter; small seeds are planted near the surface, larger seeds are planted deeper. Now take your seeds and start to place them into each of the holes you have created. If you are using new seed, sow 1 seed per hole, as your germination rate should still be high. If you are using seed that is a few years older, it might be an idea to sow a few per hole, as they may not all germinate.
With the seeds placed in their holes, it is time to gently cover them back over with media. Again, take care to only firm down gently, so as to avoid compressing the media. One final drink of water, and you are ready to put on your humidity dome! Keep the vents closed for now, as high humidity is best when the seeds are germinating.
That’s it! Planting seeds is just as easy as that and now all you have to do it wait. This can be the hardest part for some people, they’re excited and just want to see their babies grow! The key here is patience, sometimes seeds can take weeks to germinate and sprout! Just ensure your seed tray stays in a nice warm spot, with the humidity nice and high, as this will give your seeds the best possible chance at success!
Hopefully you are now feeling prepared and excited to get started with your own seeds! If you have any further questions, or are in need of supplies and advice, please come and visit one of our locations! We have experts on hand who are both knowledgeable and passionate about seed starting, and would love to share!
Also, you can check out this video for a visual example of what we’ve been talking about today.